Archive | My Sweet Tooth! RSS feed for this section

Chocolate Chip Cookie Dough Balls

6 Jun

It all started one week night after my boyfriend had a few beers and decided he wanted something to eat. We didn’t have anything, and he was craving something sweet… so he decided to make chocolate chip cookie dough! It turned out pretty good, but it just wasn’t right. Let me just say, that it is pretty damn funny to see him in the kitchen telling me what to do for him and stirring up a batch of chocolate chip cookie dough with a beer in his hand!

So…I first found this recipe on Joy the Baker’s blog and had to make this right away! It was a smashing success! However, I never got the dough to the ball stage… never. Honestly, this is the first time they’ve made it this far! At first I made it and was like, “Hey, everyone! Have some cookie dough!”. And they would eat some, but I would usually finish it within a few days (shame). Then I would start making it while I was alone, telling myself I would tell everyone and share it with them… well that didn’t happen, I just hid it in the fridge and ate it myself! I would text my boyfriend: ‘I caved and made some cookie dough… again’ and he would just laugh at my lack of self-control. Then I told myself, ‘well, what if I put it in the freezer and stick a note on it saying “Only one spoonful, Sonja!”‘… that didn’t work either. So, I wrestled with myself for a while about what to do and decided I just couldn’t make it anymore!

My boyfriend’s brother just got engaged to the woman of his dreams, both of whom we are in contact with regularly and spend time with them as often as we can. So I said to myself, “Holy shit, their engagement party would be the perfect time to make the cookie dough balls! But, I won’t have any… maybe just one spoonful… and then I’ll have to try the finished product…” AND I wanted to put this up on my blog for a while and was waiting for an excuse to make these so I could pass them off to someone else, that way I didn’t have to deal with them being around and me stuffing my face! The good news is that I healthified Joy’s recipe so instead of using a whole stick of butter (eek!) I only use 2 tablespoons! You can also consider using white whole wheat flour or whole wheat pastry flour to increase the whole grain content. I like the amount of sugar in the recipe, but if you don’t have that much of a sweet tooth you can decrease it too. I want to add that I don’t have the full nutrition information, because it depends on how big you make your balls and how many chocolate chips you want and if you decide to dip them in chocolate or do something else with them. For one small ball it’s around 70 calories, just a ballpark figure.

Ingredients:

2 Tbls butter

1/3 cup granulated sugar

1/2 cup brown sugar

1/3 cup non-fat yogurt (I like Dannon Light and Fight, vanilla or Greek yogurt)

1 tsp vanilla

1 cup and 2 Tbls all-purpose flour

½ tsp baking soda (for the flavor as Joy says, and she is damn right)

¾ tsp salt

Mini chocolate chips – as many or as little as you like, I don’t like a whole lot in there so 1/3-1/2 cup works for me

Nuts – I don’t add these, but if you like nuts in your chocolate chip cookie dough then you better put them in

Directions:

Directions:

Cream the butter with the sugars. Add the yogurt and vanilla. Separately combine the flour, baking soda, and salt and sift into the batter and stir to combine. Then add the chocolate chips and nuts (if using). Put that shit in the freezer right now! You can only like the bowl and spatula!

           Goal: get to this last stage!

After a few hours in the freezer, take the dough out, roll them into balls, placing them on wax or parchment paper on a cookie sheet and put back in the freezer so they harden before dipping in the chocolate.

If you have a double boiler use it, if you are poor and frugal like me use your own makeshift double boiler (small pot of water with a glass other type of bowl on top, then put in the chips).

     Stick a toothpick in the hardened balls (hehe) and dip in the chocolate. Drop on the wax paper you just used (may want to flip it so it’s completely clean) and refrigerate them all!

And Voila! You have delicious, party-friendly, healthy—-er, chocolate chip cookie dough balls! My boyfriend and I brought them to the engagement party and they were almost all gone in minutes! SUCCESS!

Enjoy:)

Banana Cake Balls

1 Jun

It was my boyfriend’s brother’s birthday a few weeks ago and I wanted to make him something. I had some bananas, but a full on cake to a raging party didn’t seem sensible so I had the bright idea of making these little banana cake balls. I used Queen Frostine’s banana cake recipe whipped up some random frosting I made up on the spot and mashed it all together! I then rolled them in chocolate bits and some cocoa. I wanted to dip them in chocolate so they had a coating of chocolatey goodness, but didn’t have the time, or patience or…?

Any frosting with this will do, I wanted to do a cream cheese one but of course didn’t have any cream cheese around so I used Greek yogurt instead! Turned out pretty well… but you could experiment with a chocolate, cinnamon, cream cheese, or peanut butter frosting too!

For the cake recipe check out Queen Frostine Banana Cake. Then make your favorite frosting while the cakes are cooling. Once the cakes have cooled you can do this:

 Crumble it up with your hands and mix in your frosting (by hand or with a wooden spoon).

Then take a small handful of the cake mixture and roll in some chocolate, then sprinkle with cocoa. Get creative with your toppings too if you want like toasted coconut, peanut butter chips, walnuts or pecans, or sprinkles! Stick some lollipop sticks in then or toothpicks and you are set! Everyone loves these because you can just pop them in your mouth, no utensils of plate required.

Enjoy!

Whole Wheat Graham Crackers

29 Aug

These are AWESOME!! I got the recipe from the Whole Foods website, but I’ve experimented with some things. You can definitely change the flavorings and sweeteners. I like using agave nectar instead of the honey, you can also use maple syrup or brown rice syrup (I’ve personally never used this, but I assume it would work?). We’re going for non-processed things here… and now I will get into why I came across this recipe.

I wanted to start making my own graham crackers a year or so ago because all of the packaged ones have partially hydrogenated oils! I was infuriated… seriously, I was. What are they? They are made by man by bubbling hydrogen gas into vegetable oil (unsaturated oil) to make it more sturdy. It can resist more processing so it’s easier to get into packaged foods than unhydrogenated oils. Partially hydrogenated oils are found in the ingredient list, but show up as trans fats on the nutrition label.

Why avoid them? Not only do they increase your bad cholesterol (LDL) they reduce your good cholesterol (HDL). AKA they are assholes. And what on earth does your body do with trans fats? Well since it isn’t natural it doesn’t know how to use them so it takes a considerably longer time to digest them… soooo they just chill out in your body, particularly in your arteries and around your organs, which are the worst places for them to be. You can find out more information about trans fats here, but I just wanted to add my two cents. And I’m not done:)

There’s a lot of information and warnings about trans fats these days, but I’d like to shine some light on a piece of information I’m not sure many of you know (or maybe you do and if so… yay!). The FDA has regulations over nutrition labeling and trans fat has become such a big deal they made regulations on labeling. However, companies can say that their food is trans fat free and has 0g of trans fat per serving even if they have up to .5g of trans fat. Ummm WTF! Come on. So, for example let’s look at creamer; most people like it, it’s sweet and virtually fat-free. However, it has partially hydrogenated oils in the ingredient list so it must have trans fat yet they can label it as free of trans fat. When you think about it the serving size for creamers are 1-2 tbsp depending on the brand. People use at least that much if not more so they can be getting up to 2+g of trans fat when they think they’re getting none at all! So when you think you’re doing something good for yourself, PSYCH! You’re not (fyi: creamers aren’t made from real dairy, but act like it. Natural?…).

Anyways… so these graham crackers are so delicious. It’s harder than you think to get them crispy all the way through unless you cook them longer and get them darker than I care for. I just embrace the chewiness in the middle, makes it more like a flat cookie!

Btw, if you want to just skip all my ranting about partially hydrogenated oils feel free.. I just thought I’d share 🙂 But without further banter I give you amazing whole wheat graham crackers!

Makes 2 dozen (24)

Ingredients:

1 1/4 cups whole wheat flour
1 1/2 teaspoons ground cinnamon
1/2 teaspoon baking soda
1/2 teaspoon salt
2 tablespoons cold butter, cut into small pieces
2 egg whites, divided (or 1 egg white and some milk, you’ll see)
6 tablespoons dark brown sugar (I just used light brown, but whatever you have will do)
2 tablespoons honey
1 tablespoon vanilla extract
3 tablespoons raw or turbinado sugar (or granulated)

*Like I said you can experiment with your sweeteners (maple syrup, agave nectar, brown rice syrup…) and even reduce the sugar (go for reducing the brown sugar first). I also didn’t have raw or turbinado sugar so I just used granulated, still yummy.

Directions:

Preheat the oven to 350 and grease 2 baking sheets with cooking spray or use parchment paper.

Combine the flour, cinnamon, baking soda, and salt in a large bowl. Cut in the butter and use your fingers to combine it resulting in a fine meal. In a separate bowl whisk together 1 egg white, brown sugar, honey and vanilla. Add this to the flour mixture and stir until a sticky dough forms. If your dough isn’t coming together you can add some milk or water, but only in small amounts.


Take half of the dough and place it on a floured working surface. Roll it out as thin as you would like. I try for the whole cutting board length in a rectangle. Keep the surface floured so the dough doesn’t stick. Carefully cut into 12 rectangular graham crackers and place on your baking sheet. Using the extra egg white (whisked slightly or milk) brush the tops with it and then add half the sugar. Do the same with the remaining dough. Don’t worry if your crackers don’t have perfect edges, mine never do and I’m not going to waste dough by cutting off the imperfections.


Bake these goodies for 12-14 minutes until they are brown and fragrant. Set them aside to completely cool because this is when they really harden. Keep them in an airtight container.

These are great for snacks, maybe used for a cheesecake crust, crumbled over ice cream, spread with peanut butter or nutella (topped with bananas too!), dipped in hot cocoa or caramel sauce… possibilities are endless. Oooo you can even wrap up the nicest looking ones and give them as a heart-warming gift!

   *I had some with my homemade chocolate ice cream! Eeeek.. delicious.

These go fast so I hope you enjoy them!

NUTRITIONAL INFORMATION per graham cracker:

Calories: 60   Fat: 1g (.5g saturated)   Fiber: 1g   Protein: 1g   Sodium: 80mg

Lemon Curd

15 Aug

So I have a new favorite thing to make, I could honestly eat the whole batch in one sitting! It takes like 15 minutes to make and has only 4 ingredients. I made a Flourless Almond Cake, possible post about… if you want me to post it let me know! I had used 3 egg whites for the cake so I had leftover yolks and didn’t know what to do with them. I didn’t want to make some extravagant, multi-ingredient thing so I looked online for a while and found lemon curd 🙂 I’ve made it before for Lemon Tartlets (one of my boyfriend’s favorites now), but the recipe for the curd was different. I’ve messed around with the recipe a little and have discovered how I like to make it best. One of the recipes called for whole eggs and zest… the whole eggs did add volume, but left stray pieces of cooked whites and the zest made it weird to eat.

This recipe is foolproof, simple, easy, and will impress anyone who gets their hands on your little jar of sunshine. You can eat it straight (I often do), on toast, waffles and pancakes, as a topping for ice cream, a spread for crackers, or dressed up by putting into mini tart shells and topped with homemade whipped cream… all of which are easy and delish!

Here it is! It makes 3/4 cup and I’d say 1 tbsp per serving is good so about 12 servings depending on how big your tbsp is 🙂  Enjoy…

Ingredients:

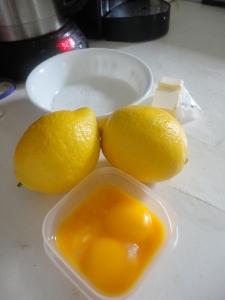
2 lemons, juiced (you can also make lemon-lime curd and use 1 lemon and 1 lime, juiced)

3 egg yolks (feel free to try whole eggs if you want)

4-8 tbsp sugar

3 tbsp butter, cut into tbsp

Directions:

Get everything ready, juice, yolks separated, sugar in a bowl (with a tbsp measure out), and butter cut into 3 tbsp. On medium-low heat combine yolks and juice in a small saucepan and stir until well combined. Stir or whisk for a little bit longer until the mixture gets a little thicker (a few more minutes). Gradually add 1 tbsp of sugar at a time until you get the right sweetness. I made it once with only 4 tbsp of sugar, it was really tart, but I loved it! 6 tbsp consistently gives good results, but sweeten to your taste and don’t be afraid to test it during this process.

Next, once you’ve gotten the sweetness you like, add the butter 1 tbsp at a time, melting the butter completely into the mixture before adding more. Continue to stir until the curd thickens. You know it’s done with it sticks nicely to the back of a metal or wooden spoon. It will also thicken as it cools so don’t fuss too much about this.

   Or  

Put the lemon curd into a glass jar (or whatever Tupperware you have) and store in the refrigerator. I would say to eat this within a week… if it lasts that long!

*For mini tartlets you can use pie crust dough to make the shells. Spray a muffin tin with cooking spray, cut out appropriately sized portions of dough and press into the tin. Prick with a fork and bake according to package directions, or if using a homemade crust bake it like you normally would! Remove the shell, fill with lemon curd, and top with whipped cream and any other garnishes you desire!

NUTRITIONAL INFORMATION, per tbsp (12 tbsp total):

Calories: 56   Fat: 3g (2g sat)   Fiber: 0g   Protein: 1g   Sodium: 18mg

*This will easily replace your jam to spread on your morning toast 🙂

Queen Frostine Banana Cake

2 Aug

This is a Queen Frostine recipe. Ever have old bananas? They can get old really fast! If you ask my family, and my bf’s family, I used to be notorious for making banana bread whenever old bananas were around. Even when my bf and I would go out to his sister’s house and babysit… if she had old bananas she would let me use them. I went through a banana bread making phase; a slice is great for a snack or breakfast on the go with fruit and yogurt. However, I like making different things so I’ve been making new things with my old bananas. This is not a new recipe, but I haven’t made it for a while… Queen Frostine would always make it, she has adapted it from The Joy Of Cooking. This is a pretty healthy cake and I like it for a snack .

There are a few ways to present this cake. The recipe makes two 8-9 inch round cakes. If you want to serve them separately you can dust them with confectioners’ sugar, spread on chocolate frosting, or serve them together and spread the bottom layer thinly with yogurt and strawberries (feel free to use bananas, raspberries, jam, peanut butter, chocolate spread… get creative) and then drizzle the top with chocolate or confectioners’ sugar, which is what Queen Frostine usually does for the two-layer cake.

This cake stores well and should be eaten within a week. You can leave it out for a few days, covered, and then refrigerate it to preserve it longer. I like to make this for my roommates…it usually is gone within a week, max!

It doubles and triples easily and freezes well if you don’t want to eat it all just right then. As I said it can be dressed up or down… it just depends on what you want! The ingredient list is prepared a little differently, just because it’s easier to group them like this.

Each cake serves 8

Ingredients:

Prepare:

1 C mashed ripe bananas (2 medium)

¼ C vanilla yogurt, non-fat (I use Dannon Light & Fit) or sour cream

¼ C milk

1 t vanilla extract

Cream:

1/4 C butter (1/2 a stick)

1/4 C vanilla yogurt, fat-free sour cream, or applesauce (pureed pumpkin could even work!)

1 C sugar

2 eggs

Whisk together:

1-1/2 C  all-purpose white flour

3/4 C  whole wheat pastry flour (use regular whole wheat if you don’t have this OR you can use all White Whole Wheat flour… I do this and use Eagle Mills)

½ t baking powder

3/4 t baking soda

¼ tsp salt

Directions:

Preheat oven to 350° and grease two 8 or 9 inch round cake pans.

Fold flour and banana mixtures into the butter/sugar mixture, alternating, in two batches until completely combined.

*OH!! I almost forgot… lick the spoon:) AFTER you spoon the batter into the pans

Spoon the batter evenly into the pans and bake for 20-25 minutes or until done in the center (check with a toothpick). Let cool slightly, then take out of the pans and cool on a wire rack.

Once cool you can either dust them with confectioners’ sugar or spread with chocolate frosting or make a two-layered cake. The choice is yours! I decided to use the cakes separately and dust one with confectioners’ sugar and the other I spread with chocolate frosting I made and froze a long time ago.

This is great served with light ice cream or frozen yogurt and fresh strawberries… however, it’s best served with loved ones. ❤

*Here are a few add-ins to put in the batter before baking that would be nice: nuts (pecans or walnuts), chocolate chips, peanut butter chips, all-spice (for spiced banana cake), rum extract instead of vanilla (or real rum instead of milk!), mini-marshmallows (for the kids… right?), coconut (this can even be sprinkled on top of frosting too)… and anything else you have on hand and want to try!

Here’s a few pictures of how I made the cake in New Zealand:

NUTRITIONAL INFORMATION (total of 16 servings, 8 servings per cake… before toppings!)

Calories: 156   Fat: 3g (1g saturated)   Fiber: 1g   Protein: 3g   Sodium: 139mg

Chocolate Mousse Cake

13 Jun

This cake will blow your mind! I made it for my mom’s 55th birthday celebration and she kept saying, “Oh, Sonja… this is a keeper! This is memorable!” It is so chocolatey rich with a beautiful texture. It is time consuming to make and should be made the day/night before you serve it;  the active time is about 35 minutes, but the total time is about 3 hours (including 2 hours non-refrigerated cooling time).

I found this recipe on eatingwell.com. We also made the candied orange peel, but to be honest I didn’t think it added much to the cake. Then again I don’t care for orange and chocolate together. I prefer having it with ice cream and fresh fruit, but feel free to use the recipe they have (click the link above).

Ok… how did I find this? I was originally going to make German Chocolate Cake (from scratch of course!). But, then my mom called me saying she wanted something on the healthier side (still had to be chocolate though) so I searched my usual sites and found this. Not only did it sound the best, but it was the healthiest! Your jaw will drop when you see the nutritional specs for this… especially after you’ve had a piece.

If you like chocolate or anything delicious for dessert for that matter I can GUARANTEE that you will fall in love with this cake.

Ingredients:

7 oz 60% bittersweet chocolate, chopped, or bought as chips (about 1 1/3 cups)

1/3 cup cocoa powder (NOT Dutch processed, get natural)

2 tbsp all-purpose flour

2/3 cup plus 1/4 cup granulated sugar, divided

1/8 tsp salt

1 cup skim milk

2 large egg yolks

1 tsp vanilla extract

3 large egg whites, at room temperature

1/8 tsp cream of tartar

Directions:

Place oven rack in lower third of oven and preheat to 350 degrees. Line the bottom of one 8 or 9 inch cake pan with parchment paper or waxed paper, then evenly and generously spray the whole cake pan with cooking spray. Put a kettle of water on to boil for a later step (used as part of the baking process).

Put chocolate and cocoa in a large mixing bowl.

Combine flour, 2/3 cup sugar, and salt in a small saucepan. Gradually whisk in the milk. Cook over medium heat, stirring constantly with a wooden spoon making sure to scrape the sides and bottom of the pan to prevent burning. Once the mixture begins to boil, gently boil it (still stirring constantly!) for 2 to 2 1/2 minutes. The mixture will get thick. Then remove it from heat and pour over the chocolate and cocoa. Stir until all the chocolate melts and it’s smooth (it will be thick). Stir in egg yolks and vanilla.

In a separate mixing bowl, with an electric mixer or standing mixer, beat the egg whites and cream of tartar until soft peaks form. Gradually add 1/4 cup sugar and continue to beat until stiff peaks form.

Gently and gradually (about 1/4 of the mixture at a time) fold the egg whites into the chocolate batter until no white streaks are left. Scrape the batter into the cake pan, it will come up to the brim.

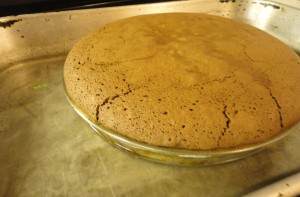
Set the cake pan in a larger pan, I used a large casserole dish. Pour enough boiling water into the larger pan so it comes a third to halfway up the cake pan. Bake for 20 to 25 minutes. The surface of the cake will be slightly crusty and the cake will spring back when touched.

Take the cake pan out of the larger one and let it completely cool on a wire rack (about 2 hours). Cover with plastic wrap and refrigerate overnight.

Time to serve: To remove the cake from the cake pan run the blade of a thin knife under hot water, dry, and run it along the edges of the pan. Choose a serving plate, place it upside-down over the cake, and flip the cake. It will be upside-down… on purpose. To slice, once again run the blade of your knife under hot water, dry, and slice (do this for each slice you cut). This cake yields 12 servings.

Like I said… I like mine with ice cream and fresh fruit!

NUTRITIONAL INFORMATION:

Calories: 164   Fat: 6g (saturated 3g)   Fiber: 2g   Protein: 3g   Sodium: 49 mg

Cocoa-Coffee Fudge Cake

20 May

I found this recipe at eatingwell.com a year ago while searching for relatively “healthy” chocolate cakes. You can only reduce the fat and sugar so much before the cake loses it’s appeal and that’s why I love this cake! It is so ooey gooey you won’t be able to stop picking at it even after you’ve had your share.

I made it for my mother’s birthday last year with great results… it may look strange when you put it in the oven, but some sweet chemistry goes on and the batter rises over the coffee creating a fudgey center. Enjoy!

Cocoa-Coffee Fudge Cake

Active time: 20 min (total: 1 hr)

Serves 8, 1/2 cup each

Ingredients:

1/2 cup whole-wheat pastry flour (or whole wheat flour if you don’t have this)
1/2 cup all-purpose flour
1/3 cup sugar
1/4 cup unsweetened cocoa powder, sifted
1 1/2 teaspoons baking powder
1/2 teaspoon salt
1 large egg
1/2 cup skim milk (or whatever you have on hand)
2 tablespoons canola oil
2 teaspoons vanilla extract
3/4 cup semisweet chocolate chips (any sweeter and the cake won’t be rich enough)

1 1/3 cups hot brewed coffee
2/3 cup packed light brown sugar
1/4 cup chopped walnuts, or pecans, toasted
Confectioners’ sugar, for dusting

Directions:

  1. Preheat oven to 350°F. Coat a 1 1/2- to 2-quart baking dish with cooking spray. Whisk whole-wheat flour, all-purpose flour, sugar (1/3 cup), cocoa, baking powder and salt in a large bowl. Whisk egg, milk, oil and vanilla in a glass measuring cup. Add to the flour mixture; stir with a rubber spatula until just combined. Fold in chocolate chips. Scrape the batter into the prepared baking dish.
  2. Mix hot coffee and brown sugar in the measuring cup and pour over the batter. Sprinkle with nuts. (It may look strange at this point, but don’t worry. During baking, the cake forms on top with sauce underneath.) *I didn’t believe this statement when I made it, but… it actually works!
  3. Bake the pudding cake until the top springs back when touched lightly, 30 to 35 minutes. Let cool for at least 10 minutes. Dust with confectioners’ sugar and serve hot or warm.

I made a double batch, one with nuts and one without:


This is best served warm with ice cream and fresh fruit (strawberries are my first choice, but raspberries would work as well)!

NUTRITIONAL INFORMATION:

Calories: 220   Fat: 7g (1g saturated)   Fiber: 2g   Protein: 4g   Sodium: 237 mg

It’s obviously a crowd-pleaser:)