Archive | Rice and Pasta RSS feed for this section

Penne with Vodka Sauce

20 Jul

This recipe stems from a Weight Watchers recipe that I found online. My mom has been into Weight Watchers for a while so I got used to figuring out the points of my main dishes. I think this one was round 7 or so. When I first made it I loved it, but figured I could change it a bit so you could have more sauce with fewer calories… and I was right! I have worked my healthifying magic once again, and even on an already healthy Weight Watchers recipe! Don’t worry, this is amazing and will blow your socks off. My boyfriend LOVES this dish! And what’s not to like… You have pasta, heavy cream, wodka (ode to my German roommate in New Zealand 🙂 ) and fresh basil.

To healthify the recipe I used more tomato paste to make the base of the sauce, the same amount of heavy cream, but added milk to extend the sauce, and more shallots to semi bulk it up a bit.  This would be great to make the sauce and noodles separately and then combine them when you want to eat it. My problem is I work 5:30-10 a lot during the week and every other weekend so I barely get time to eat with my man. Often times I make the meal, package it up (aka add the pasta and sauce together then put in Tupperware in the fridge) and take it to work where I have to f**king microwave it… NOT ideal and NOT fresh. Also, when you refrigerate it the sauce soaks into the pasta and you are left with, seemingly, less sauce so give my suggestion a try! Just measure our how much sauce and pasta you make and divide by how many servings you want (this recipe makes 8 servings, 1 cup each… I’m not sure how many cups of sauce of noodles are separately).

By the way… yes I have noticed that the majority of my main dish posts have been pasta. Hope you like pasta and carbs!

Ingredients:

12 oz SmartTaste Penne

1 Tbsp butter

4 Tbsp shallots (I used 2, but you can use more if you want), I love using shallots because they are a bit milder and very delicate tasting

2 medium garlic cloves

6 Tbsp tomato paste

1/4 cup vodka

1/2 cup heavy whipping cream

1/2 cup skim milk (you could probably just get 1/2 and 1/2 or fat-free 1/2 and 1/2)

1 tsp salt (or more… definitely more)

1/4 tsp pepper

2 Tbsp parsley

Fresh basil for garnish (a must!)

Directions:

Chop your shallots, garlic and parsley (get the chopping out of the way). Cook your pasta according to directions.

Add the butter to a large skillet (medium temp/flame) and saute shallots and garlic for 3-5 minutes NOT burning them.


Add the parsley, salt and pepper, and tomato paste and stir until everything is combined… like this:


Cook this for about five minutes, stirring occasionally so it doesn’t burn. Here comes the good part: wodka:

Add the wodka, scraping the bottom of the pan to get all the little yum yums detached from it and cook for about 5 minutes to release some of the wodka flavor. I will note that not all of the wodka will be evaporated, but that’s a good thing. The flavor it brings to the dish is amazing and I mean it IS Penne with Vodka Sauce so…

Add the cream and milk to the mix, reduce the heat to low and simmer for 3 minutes (these times are estimates, go by how you feel). This is what it should look like:

 Drooling yet? No? Getting close?

Now all you need to do is add the pasta and top with basil! You can do this dish-by-dish or do it all and have left-overs (when you heat it up add a bit more milk/cream and you’re good to go!).

 Eat it!  Mmmm… this is what satisfaction looks like.

Now for the nutrition information… this dish serves 8, 1 cup each!

Nutrition Information:

Calories: 243

Fat: 7.75g

Protein: 6.5g

Carbohydrate: 39g

Fiber: 5g

Sodium: 422 mg

Healthy food doesn’t need to be bland or boring! I’m bringing you healthy dishes that excite your palate.

Jalapeño Popper Pasta with Bacon

18 Jul

I want to preface this post by saying, when you work with jalapeno where gloves! I sadly (and stupidly) did NOT know this and went ahead slicing up my jalapenos, taking out the seeds and ribs with my bare hands. I washed my hands several times, but never experienced any burning or pain so I didn’t think anything of it. So I was like, I guess I was right… they aren’t that hot to cause any issues! WRONG. A few hours later while I was at work I made a big mistake… I touched my eye. And ooooooooh shit did it burn! If any of you have contacts and use the hydrogen peroxide solution with the red tip and the warning that says “Do not put directly in eye”… that’s what it felt like.

I stopped touching anything that might burn, aka I was soooooooo careful when going to the bathroom, and figured it would go away soon. However, that night when I wasn’t doing anything except trying to get a good night’s sleep I started to notice more burning! I was getting pretty damn annoyed at this point and jumped out of bed to figure out how I could relieve my pain. There were all sorts of home remedies… rub your hands with Vaseline (check), wash your hands with dish soap (check), use a diluted bleach solution (check). So of course I tried them all! Then I went back to bed… 2 seconds later they were burning again! I turned to my boyfriend and tried to get him to help me.. and when he couldn’t I freaked out because my hands were STILL burning! Then I figured it was probably because of the diluted bleach solution… maybe I didn’t dilute it enough or I kept my hands in there for too long. So I looked up some home remedies for that too. I soaked my hands in cold milk for 10 minutes, went back to bed, woke up with burning hands and did it again then rinsed my hands in cold water for as long as I could stand. My hands still tingled when I went to bed, but when I woke up they weren’t nearly as bad as they were before. So………. the whole purpose of this story is to warn you to WEAR GLOVES WHEN WORKING WITH JALAPENOS! Don’t make my dumb mistake.

Although I suffered a bit to make this dish, the outcome was amazing! The pasta tasted just like jalapeno poppers! The bacon on top added a nice crunch and some extra flavor. Next time I make this though I’m going to finish it off in the oven with toasted bread crumbs on top to emulate a fried jalapeno popper. I hope you enjoy this!

Time: takes about 30 minutes total

Servings: 8 (6 if you’re hungrier or a man 🙂 )

Ingredients:

12 oz SmartTaste spaghetti

2 jalapeno peppers, halved and de-seeded (using gloves for crying out loud!)

8 oz + 2 Tbl 1/3 reduced fat cream cheese

1/4 cup (or more) skim milk

1/2 cup grated Parmesan cheese (or any other hard cheese you want)

1 tsp salt

1/4 tsp pepper

4 pieces turkey bacon (I like Butterball or Oscar Meyer, Jennie O doesn’t have enough fat in my opinion)

Directions:

First, start cooking the pasta and make sure the water is salted (add salt AFTER the water is boiling). Then either grill your jalapeno halves or roast them in the oven (425 for about 15-20 minutes depending). I thought I would need more than 2 jalapenos for this dish… then I realized I’m weak when it comes to spicy food so I laid off, but if you want more of a kick feel free!

Once the peppers have a nice char on them, take your softened cream cheese, milk, Parmesan cheese, peppers, and seasonings and blend them together. Blend until… blended! Boom! Done 🙂

Crisp up your bacon (you can do 1/2 or 1 piece per serving, the nutrition information is for 1/2 a piece). Add the jalapeno popper sauce to the cooked spaghetti and top with bacon crumbles!

     Delicious, right? Right.

Nutrition Information (8 servings):

Calories: 246

Fat: 9g (4.7g saturated)

Protein: 9.8g

Carbohydrate: 36g

Fiber: 4.8g

Sodium: 564mg

Fava and Feta Couscous Spinach Salad

1 Jun

So one evening when I went to work my stomach was unsettled, I was not feeling good, and all I had to eat for dinner was a steak and cheese sandwich. NOT something you want to eat at a time like that so I decided to hop over to a local co-op (Seward Co-op in the Cedar-Riverside area of Minneapolis) to grab some deli food for dinner. I found a couscous salad that had spinach, red pepper, fava bean, and feta in it along with a side of probiotic yogurt and fruit… I was set for the night. Little did I know that this couscous salad would change how I looked at couscous! The dish was so fresh and light I had to recreate it myself! So I did. And let me tell you… it’s f*cking great. I think I nailed it on the head and boy am I glad I did because the next week I stopped by the Seward Co-op to see if I got all the ingredients right from the label and it wasn’t there!

This is great for spring and summer and even in the fall and winter months to give you a little fresh boost, something other than your regular comfort food. The flavors are simple and clean, which is a breath of fresh air sometimes so please give this recipe a shot!

Ingredients:

1 cup dry couscous

¼ cup extra virgin olive oil

Juice of 1 lemon and some zest (about ½ the lemon)

1 can fava beans or 1 ½ cups (in the Mediterranean/Ethnic food aisle or at your local co-op)

4 oz feta cheese cut into cubes (I like plain)

½  of a red pepper thinly sliced

3 cups fresh spinach, chopped

Salt and pepper to taste (I used 1 tsp salt and ¼ tsp pepper)

Directions:

     +          =     

You can use left-over couscous or make some for this, but make sure it has been cooled. Add the oil and lemon. Chop your feta, pepper, and spinach. Add everything to the couscous and salt and pepper to taste! Refrigerate this for a few hours before eating to allow the flavors to sink in.

This recipe makes about 8-9 cups and serves 6 so everyone gets 1 1/3 – 1 1/2 cup!

Nutrition Facts (per serving):

264 Calories

14g Fat

3g Fiber

8g Protein

Also, a serving of this dish provides you with about 94% of your daily recommended intake of Vitamin K and 36% of you daily recommended intake of Vitamin A! Hope you enjoy this!

Butternut Squash Ravioli with Gorgonzola Sauce

17 May

What is a major staple in autumn cuisine? Butternut squash. Now I love butternut squash ravioli, so creamy and delicious. I have found a recipe that I have adapted a bit to fit my taste buds. The original recipe was for Pumpkin Ravioli with Gorgonzola Sauce, which is good, but they asked for canned pumpkin… canned pumpkin in ravioli? Puke. I used real pumpkin and it was a lot better, but I love butternut squash so I went for it, feel free to use pumpkin if you wish… but promise me and yourself that you won’t go for the canned pumpkin. Please. This dish may surprise you because guess what!? It’s also healthy. I hope you are noticing a trend here… and jump on the band wagon because you’ll thank me later in life.

Although the recipe is a bit time-consuming, only because putting filling in ravioli can be a pain in the ass, it’s worth it. AND you can do that ahead of time and just through them into a pot of boiling/simmering water and voila! Homemade ravioli in minutes and it even serves 6!

Ingredients:

1 1/4  cups  pureed butternut squash or pumpkin
2  tablespoons  dry breadcrumbs
2  tablespoons  fresh grated Parmesan cheese
1/2  teaspoon  salt
1/2  teaspoon  minced fresh sage
1/4  teaspoon  freshly ground black pepper
1/8  teaspoon  ground nutmeg
30  round wonton wrappers
1  tablespoon  cornstarch
Cooking spray
1  cup  fat-free milk
1  tablespoon  all-purpose flour
1 1/2  tablespoons  butter
1/2  cup  (2 ounces) crumbled Gorgonzola cheese
3  tablespoons  chopped hazelnuts, toasted (or other nuts if you don’t want hazelnuts)

Preparation:

Stir together butternut squash, breadcrumbs, Parmesan, salt, minced sage, pepper, and nutmeg.

Working with 1 wonton wrapper at a time (cover remaining wrappers with a damp towel to keep from drying), spoon 2 teaspoons pumpkin mixture into the center of wrapper. Brush edges of wrapper with water and fold in half, pressing edges firmly with fingers to form a half-moon. Place on a large baking sheet sprinkled with cornstarch. Repeat procedure with remaining wonton wrappers and pumpkin mixture.


Fill a large Dutch oven with water; bring to a simmer. Add half of ravioli to pan (cover remaining ravioli with a damp towel to keep from drying). Cook 4 minutes or until done (do not boil), stirring gently. Remove ravioli with a slotted spoon; lightly coat with cooking spray, and keep warm. Repeat procedure with remaining ravioli.

Combine milk and flour in a saucepan, stirring with a whisk. Bring to a boil; cook for 1 minute or until thick, stirring constantly. Remove from heat. Add butter, stirring until butter melts. Gently stir in Gorgonzola.

Place 5 ravioli in each of 6 shallow bowls, and drizzle each serving with 3 tablespoons Gorgonzola mixture. Sprinkle each serving with 1 1/2 teaspoons hazelnuts. Serve immediately.

Yum!

Nutrition Facts (5 ravioli and sauce):

Calories: 250 (33% from fat)

Fat: 9.1g (sat 4.5g,mono 2.7g,poly 0.7g)

Protein: 9.5g

Carbohydrate: 33g

Fiber: 3.1g

Cholesterol: 22mg

Iron: 2.4mg

Sodium: 636mg

Calcium: 162mg


Mushroom and Chicken Couscous with Lemon and Dill

29 Aug

I made this recipe up because I wanted to use up my whole wheat couscous. There isn’t really a story behind this one or anything so… sorry? But… it’s so good! It can be eaten hot or cold and works well for left-overs. The lemon and dill give it superb flavor and the mushrooms, chicken, and couscous make it a filling meal. I added sour cream and Parmesan for creaminess.

You can also use leftover chicken which is great and cuts the prep time!

Check out this recipe:

Serves 5 (about 1 cup)

Ingredients:

2 skinless, boneless chicken breasts OR equivalent in left-overs (12-14 oz total)

1 cup whole wheat couscous, dry

1 1/2 cup boiling water

8 oz mushrooms, sliced (I used mini portobello, but white button can work too)

1 medium onion, thinly sliced

1 tbsp butter

Salt and pepper to taste

Dill, fresh, to taste

Juice of 1 lemon

2 tbsp sour cream

1/4 cup Parmesan cheese

Directions:

Start with your chicken. Heat the oven to 350, sprinkle the breasts with salt and pepper and place a few fresh dill sprigs on top. Bake the chicken until done (about 15 minutes for me, but baking times will vary). Once the chicken is done, remove it from the oven and let it cool. Then you can shred it into bite-size pieces.


Start your couscous. Heat 1 1/2 cups water to a boil and place couscous in there. Cook until done (according to package instructions) and set aside.

Meanwhile place the butter into a saucepan and add the mushrooms and onion. Cook them until tender 8-10 minutes for a good browning. If you can’t find fresh dill you can add about a tsp of dried right here. Salt and pepper to taste. Remove from heat and add the sour cream and Parmesan. Toss together with your shredded chicken, cooked couscous, and lemon juice. Top with more fresh dill and Parmesan.


Feel free to add more toppings such as toasted pine nuts, chives, etc.

I admit, 5 servings is kind of weird… but let’s think about this. If you are married or in a relationship this leaves you with 2 servings for yourself (if you are female) and 2 servings for your partner (my boyfriend has much bigger portions than me… much bigger haa). But trust me you will be filled up.. and for a while afterwards too! Or… you can keep it all to yourself:)

Here are the specs per serving

NUTRITIONAL INFORMATION:

Calories: 264   Fat: 4g (2g sat)   Fiber: 3g   Protein: 25g   Sodium: 611mg

Not only does this recipe provide 50% of your daily need of protein it is a great source of certain B Vitamins, Niacin and B6 to be exact. So enjoy!!


Israeli Couscous Salad

11 Aug

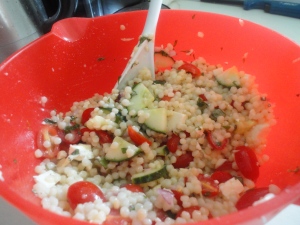
I adore Israeli Couscous. Perfect little pearls… anyways I was inspired to cook with them ever since I had them a few years ago at “The Lake”; a huge cabin my cousin’s family rents out for a week or so in the summer which is on a lake a few hours south of Indianapolis. I remember an aunt of my cousin’s would make glorious dinners for everyone (20+ people) and I distinctively remember having an Israeli Couscous salad. I don’t remember what was in it or how she made it, but damn… it was worth drooling over. Well, when I was home… ages ago, I picked up some Israeli Couscous at the Chequamegon Food Co-op (I bet you can’t say it correctly, unless you’ve been up north). Try: “Sha-wa-ma-gen” with long a’s… Anyways, it’s taken me a while to get around to using it. So last week I decided to just make up my own Israeli Couscous Salad and I am so glad that I did!

This is a chilled dish that I serve as a main, but can be a side as well (just serve less). It’s very fresh and full of flavor, just what I was in the mood for with the news breaking heat we’d been having. Who knew Minneapolis got to 100 degrees in the summer… not this girl! I’ve survived, barely. I think I was sweaty for a few days straight… gross. Back to my dish! This is easy to prepare, no sweating necessary 🙂

Serves 4 (one large 1 cup)

Ingredients:

1 cup dry Israeli couscous + chicken/vegetable stock to boil it in

1 tbsp olive oil

2 tbsp reserved cooking liquid

Juice of 1 lemon

1 cup grape tomatoes, halved

1/2 cup feta cheese, crumbled or cut into cubes

1/2 cup cucumber, cubed

2 tbsp red onion, diced

1/4 cup fresh mint

1/4 cup fresh oregano

Salt and pepper to taste

Directions:

Cook the couscous in 1 1/2+ cups liquid, I used “Better than Bouillon” paste in water. Cook it according to package instructions. Mine seemed to cook faster than 10-15 minutes, which is what I found to be the cooking time online. Just check it periodically. Drain it, but keep at least 2 tbsp of the cooking liquid.

While the couscous is cooking you can prepare your other ingredients. Combine all the vegetables, oil, lemon juice, reserved cooking liquid, and herbs. Add the finished couscous, cover and refrigerate for a few hours, or until chilled. Serve it with a little mint on top, as always salt and pepper to taste, and enjoy!

I like this because it’s not like your average cold pasta salad… using a different grain is a nice twist.

*Some more add-ins could be kalamata olives, raisins, artichokes…

NUTRITIONAL INFORMATION:

Calories: 254   Fat: 7g (3g saturated)   Fiber: 3g   Protein: 8g   Sodium: 250mg

Zucchini Fettuccine Alfredo

2 Aug

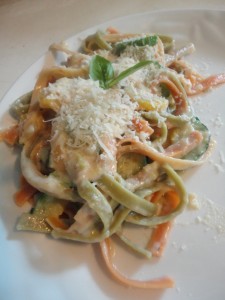
So I was at the farmer’s market on Sunday and saw some Minnesota grown zucchini and summer squash. I had fettuccine noodles in my pantry that I still hadn’t used and some parmesan cheese… fettuccine with zucchini and white sauce is what came to mind. I used my Mac n’ Cheese recipe as inspiration on how to make the white sauce, which is much like alfredo. I’m not sure if I should call this an alfredo, but it’s what I’m reminded of when I eat so I’m gonna call it that!

Oh.My.God. This is some goooood shit. I honestly had food-gasms while I was eating it and licked my plate clean (duh!). The combination of mozzarella and parmesan cheeses keeps the calorie and fat count down, but still allows for amazing flavor! The zucchini and summer squash add a nice little crunch… a textural difference that a regular Fettuccine Alfredo doesn’t usually have. Garnish the dish with a little grated parmesan cheese and basil and you are in pasta heaven.

Serves 4

Total time: 20-25 minutes

Ingredients:

6 oz fettuccine pasta (I used Garden Delight from SmartTaste)

1 tbsp butter

2 cups chopped zucchini and summer squash, about 2 small-medium (a little more won’t hurt)

1 garlic clove, minced (or more if you like)

1 tbsp flour (all-purpose or white whole wheat)

1 cup fat-free milk

½ cup grated mozzarella cheese

½ cup grated parmesan cheese

Salt and pepper to taste

Basil for garnish

Extra parmesan cheese for garnish

Directions:

Get all of your ingredients ready: chop zucchini/summer squash, mince garlic, and grate cheeses.

Cook fettuccine according to package instructions.

While the pasta is cooking melt butter in a large skillet. Add zucchini and sauté until still crisp, a few minutes, and then add garlic and cook for 1 minute more. Add flour and whisk for 1 minute (to get the flour taste out of the dish). Gradually whisk in milk and whisk constantly until it starts to thicken, 3 minutes or so.

Add cheeses and stir until just melted. Take the pan off the heat, add the fettuccine and stir until every noodle is covered in deliciousness.

Garnish with my suggested garnishes, always optional, and devour!

NUTRITIONAL INFORMATION:

Calories: 302   Fat: 9.75g (5g saturated)   Fiber: 4g   Protein: 17.25g   Sodium: 617mg

*This dish is a great source of calcium providing 35% of your recommended daily dose!

Caramelized Onion and Bacon Pasta with Grape Tomatoes and Basil

12 Jul

I made this up a few days ago. I wanted to use the fresh basil I have in my container garden; a fresh and light pasta sounded spot on to me. I love just inventing things like this… making something totally your own is so fun! And… if it tastes good I’m really proud. This is one of those!! Granted the name is long, but I didn’t know what to call it. I feel like recipe titles just have the major ingredients in it and aren’t creative, soooo I obviously wasn’t being very creative. Any ideas? Please leave a comment!

Ingredients:

6 oz pasta (SmartTaste) I used Penne Rigate, but I think spaghetti or fettuccine would work too

2 oz turkey bacon (about 6 pieces)

1/2 tbsp butter

1/2 tbsp oil (vegetable or olive)

1 medium onion, sliced

1 cup grape tomatoes, cut in half

Juice of 1 lemon

2 tbsp cooking white wine (or regular white wine)

2-4 tbsp fresh basil, chopped

Kosher salt to taste

Directions:

Cook noodles according to package instructions.

Meanwhile, cook bacon in a large saucepan until crispy. Remove bacon and add oil and butter. Cook onion until it turns a little brown (it’ll caramelize more as you continue).

to –>

Then add the grape tomatoes. Cook, stirring occasionally, until the tomatoes are starting to soften.

Now add the bacon, cook for a few minutes. De-glaze the pan with the lemon and white wine, stirring for a few minutes. Take off the heat and add cooked noodles and basil.

The perfect bite:

*I added a few pinches of salt total to my pasta, but throughout the cooking process.

Separate into 4 servings (a generous cup each) and top with a little grated Parmesan and more basil if you like.

NUTRITIONAL INFORMATION:

Calories: 231.5   Fat: 7g (sat. 2g)   Fiber: 4.75g   Protein: 9.5g   Sodium: 331mg

Perfected Mac n’ Cheese

20 Jun

I have been messing with this recipe for a while now and let me tell you…it is AWESOME! I used to loooove mac n’ cheese when I was a kid, it’s warm, cheesy, and delicious. My aunt used to make it for me and my younger cousin whenever we visited in Indiana. Kraft with extra cheese (processed slices). When I started searching for healthy versions all of the recipes boasted about how healthy it was and “it even has 4 types of cheese!” Blah blah blah… looked at the nutrition facts (for the ones that had them) and a serving was like 400-500 calories with fat grams in the double digits. No thanks! I knew I could find a recipe or make one of my own that was far healthier, but still tasted amazing.

I started with a Weight Watchers recipe I found in a magazine. I added things, took some away and I have now created my own Sonja’s Special Mac n’ Cheese. This recipe serves 8, but can be easily halved. I made mine for 4 last night and saved the left-overs for easy lunches.

Ingredients:

12 oz penne, rotini, or elbow pasta (I swear by and only use SmartTaste, lower calorie than other whole wheat pastas and a good amount of dietary fiber… and tastes great)

2 tbsp butter

1 small onion, chopped

2 tbsp all-purpose flour

2 cups skim milk

2 tbsp mustard (I love Dijon)

2 egg yolks (makes this dish very creamy and full of body)

1/4-1/2 tsp salt (kosher :P)

2 cups reduced-fat cheddar cheese, shredded (you can also use 1 cup cheddar and 1 cup mozzarella, but the nutrition facts will change. The calories will go up by 50 and the fat will go up by 5g per serving)

14.5 oz can diced (stewed or fire roasted are good) tomatoes with Italian seasonings

Directions:

First start you pasta, and make sure to salt the water (I always do).

Meanwhile, you’ll start making your roux for the cheese sauce. Add the butter to a large skillet. Add the chopped onion and saute until translucent. Add the flour and whisk for about 1 minute until the flour flavor is gone (this thickens the sauce).

 Gradually whisk in milk and continue to whisk until it thickens slightly.

Then add the mustard, egg yolks, and salt. Whisk for a few more minutes.

 *I cut the recipe in half because I was only cooking for myself, hence only 1 egg yolk and 1 tbsp of mustard.

Now… the cheeeeeeeeeeeese!

 *I did a mixture of cheddar and mozzarella because I didn’t have reduced-fat cheddar.

Turn off the heat and mix until combined and all the cheese has melted (taste now if you want more salt or other spices). Add the tomatoes.

Stir to combine. Almost there! Add the cooked noodles!!

 *Okay… I think I went a little nuts with the picture-taking this time, but it spruces up the post, right?

Mix until every last noodle is covered in cheesy goodness… another picture of that.. Haa!

Oooooo… I was thinking when I was stirring this that I wish people could hear how creamy it is. But look at that! Yummm

This recipe serves 8, but (like I said and did) you can cut the recipe in half and make it for 4. A serving size is a generous 1 cup. Make your dish look pretty with some green herb on top, pretty pointless but you feast with your eyes first!

DIG IN!! Guilt free too!

NUTRITIONAL INFORMATION:

Calories: 255   Fat: 5.4g (saturated 3g)   Protein: 15.5g   Fiber: 4.8g   Sodium: 450mg

*Nutrition specs will differ depending on the cheese and pasta you use. I highly recommend SmartTaste… if not that try something that has a good amount of fiber per serving (3g minimum) and is 200 calories or less per serving (SmartTaste has 170 calories with 5g of fiber for 2 oz).